SwiftUI-First Architecture
Check out the demo project to see everything in action and to look at cute dogs 🐶
Finding the ideal architecture for SwiftUI has been a hot topic since its release. Unlike UIKit, which has its MVC, there isn't a single officially endorsed pattern. Apple takes the stance that SwiftUI can adapt to any number of different architectures.
For a long time, MVVM was my go-to, as it’s often considered to be a natural fit for SwiftUI. However, using MVVM — specifically ViewModels — comes with many pain points that are usually glossed over but present real problems in practice.
What's wrong with MVVM?
Conventionally, a ViewModel’s role is to bind the model’s state to the view. In SwiftUI, the View itself serves as a binding to state, making a separate ViewModel layer somewhat redundant.
Separation of logic from presentation, then, is the reason for ViewModels existence. I found that in reality ViewModels rarely end up holding much logic, since it tends to be deeper within the Model layer — in UseCases, Repositories, Services, etc. Consequently, ViewModels are often reduced to merely forwarding calls to these model objects and having walls and walls of code connecting publishers to its properties with the model.publisher.assign(to: $property) pattern.
ViewModels are also meant to prepare and transform model data for the Views. This also is naturally solved in the View itself, with things like the support for FormatStyle and localized strings in Text.
Genuinely, how would you even format a string for presentation in a ViewModel with, for example, proper consideration for the Locale, which is passed through the environment in SwiftUI? To properly use it you must somehow inject it during or after VM initialization, and then update it on changes. Maybe even pass it down with each function call?
This is actually by far the biggest ergonomic issue with ViewModels. Since ViewModels themselves can't resolve dependencies with the @Environment, and yet must be available at the View initialization, most likely you are going to need to prepare a separate dependency injection technique for them, bypassing the environment completely.
Another problem is that, strictly speaking, under MVVM, all view state is supposed to reside in the ViewModel, but then how to handle the focus state? How to fetch Core Data or SwiftData objects?
It also comes with performance issues, since modeling all state with @Published properties in a single ObservableObject means losing granularity in view updates, with all views observing this object being re-evaluated each time a property changes. Sure, with the introduction of Observability, performance considerations of @Published may be irrelevant, but the bigger point is that ViewModels don't really feel like they fit with what SwiftUI is and how it works.
Using MVVM feels limiting. It feels like you are bending SwiftUI to fit your architectural dogmas instead of putting it first.
SwiftUI-first
An architecture that is SwiftUI-first should fully embrace and utilize the tools that SwiftUI provides.
This definition is intentionally broad, allowing for wide interpretation. To distill it further, here are the key areas that, in my opinion, exemplify a SwiftUI-first architecture.
- State management: At the core of SwiftUI is a robust state management system. Property wrappers like
@State,@StateObject, and@ObservedObjectmake it easy to define and scope the lifetime of objects. Other wrappers, like@AppStorage,@FetchedRequest, and@Query, provide seamless integration with UserDefaults, CoreData, and SwiftData, respectively. A SwiftUI-first architecture prioritizes these tools for managing state within the app.
- Dependency resolution:
Environmentprovides a powerful mechanism of managing dependencies, allowing you to inject them into your views in a clean and organized manner. This approach should be favored over custom DI solutions or heavily relying on global objects.
- Previews: Previews are not just a development convenience — they serve as a form of unit tests for your UI code, allowing you to quickly verify the appearance and behavior of your views under different conditions. An architecture that makes previews easy to implement and maintain encourages faster and more reliable development.
- Clarity: SwiftUI promotes a declarative style that keeps UI and its behavior closely linked. An architecture should maintain this clarity, making it straightforward to understand how the app works just by examining its views.
- Flexibility: SwiftUI continues to evolve, with new features and capabilities being added each year. Since its release, it has evolved through the introduction of the
Applifecycle, Widgets, App Intents, Concurrency, Observability, visionOS, and more. An architecture should be adaptable, allowing easy incorporation of new SwiftUI features, and not hinder the adoption of new technologies.
I don't think there is a single correct answer for creating a SwiftUI-first architecture. For me personally, the most effective strategy proved to be scaling back from MVVM by removing ViewModels, then gradually refining the project structure along these areas.
The rest of the article introduces the way I structure my projects now.
Project structure
Here is an illustration showing all the different modules and how they connect to each other.
Each module is defined by the type of objects it contains.
Core
The Core module is the foundation of the project, positioned at the lowest level in the dependency hierarchy. Every other every other module relies on Core, which is responsible for defining all entities to be used throughout the app.
An example of an entity defined within Core looks like this:
struct Product: Identifiable {
  let id: UUID

  let name: String

  let price: Decimal
}
Core also includes other code that needs to be made available across the whole projects, such Foundation type extensions or utility classes.
UI
The UI module contains your user interface-related code. It is designed to depend solely on Core to ensure quick build times and stable previews.
Views create and maintain their own local state, relying on externally-injected actions. Those actions, together with the global state that is shared across the entire module, form the UI dependency.
View factories are used to abstract the use of views, view modifiers, property wrappers, and other view components that are implemented outside the UI module. View factories, along with the global state and external actions, are resolved with the dependency container.
Components within the UI module are organized into Views, Screens, and Flows.
- Views are the basic building blocks for the UI. They can be small and reusable like buttons, or larger and suited for a particular screen, like a cell for a list of one screen, or even the list itself.
struct ProductView: View {
  let product: Product

  var body: some View {
    LabeledContent(
      product.name,
      value: product.price,
      format: .currency(code: "USD")
    )
  }
}
- Screens represent entire screens within the app and handle logic for various UI states (loading, available, empty). Each Screen is independent and works without creating or interacting with other Screens.
struct ProductsScreen: View {
  @EnvironmentObject private var productsState: AppState.Products

  var body: some View {
    if productsState.products.isEmpty {
      ContentUnavailableView("No Products", systemImage: "storefront")
    } else {
      List(productsState.products) { product in
        NavigationLink(value: ProductsScreenDestination.details(product.id)) {
          ProductView(product: product)
        }
      }
    }
  }
}
- Flows are responsible for managing navigation as well as creating Screens and other Flows. They are the only UI components aware of the dependency container.
struct MainFlow<Container: AppContainer>: View {
  let container: Container

  var body: some View {
    NavigationStack {
      ProductsScreen()
        .dependency(container)
        .navigationTitle("Products")
        .navigationDestination(for: ProductsScreenDestination.self) { destination in
          Group {
            switch destination {
            case let .details(id):
              ProductDetailsScreen(id: id)
            }
          }
          .dependency(container)
        }
    }
  }
}
The UI module also houses the necessary parts for creating its previews, such as mock dependency containers, mock view factories, mock entities, images and other preview assets.
Infrastructure
The Infrastructure module provides access to the entities defined in Core, incorporating API clients, database support, and mappings between API and database objects and entities.
Here is an example of a Realm object defined in the Infrastructure model and its mappings to the Core entity.
final class ProductObject: Object, Identifiable {
  @Persisted(primaryKey: true) var id: UUID

  @Persisted var name: String

  @Persisted var price: String
}

extension Product {
  init(object: ProductObject) { ... }
}

extension ProductObject {
  convenience init(entity: Product) { ... }
}
The Infrastructure module is not directly connected to the UI module.
Service
The Service module implements the dependency that the UI module expresses with its container protocol.
Services encapsulate the use of infrastructure objects and additional logic to provide the implementation of UI actions and to manage the global state.
Concrete implementations of view factories also reside in the Service module.
Live
The Live module is at the top of the dependency hierarchy and contains the live dependency container, which assembles and holds infrastructure and service objects.
The live dependency container is responsible for resolving the UI dependency for the actual app (as opposed to previews.)
SwiftPM
The project's modular structure translates well into SwiftPM, allowing modules to be cleanly separated into targets.
let package = Package(
  name: "Package",
  products: [
    .library(name: "Core", targets: ["Core"]),
    .library(name: "AppUI", targets: ["AppUI"]),
    .library(name: "APIClient", targets: ["APIClient"]),
    .library(name: "AppServices", targets: ["AppServices"]),
    .library(name: "LiveApp", targets: ["LiveApp"]),
  ],
  targets: [
    // MARK: Core

    .target(name: "Core"),

    // MARK: UI

    .target(name: "AppUI", dependencies: ["Core"]),

    // MARK: Infrastructure

    .target(name: "APIClient", dependencies: ["Core"]),

    // MARK: Service

    .target(name: "AppServices", dependencies: ["Core", "APIClient", "AppUI"]),

    // MARK: Live

    .target(name: "LiveApp", dependencies: ["Core", "AppUI", "APIClient", "AppServices"]),
  ]
)
Further modularization
I expect the discussed modularization strategy to be perfectly suitable for small- to mid-sized projects. Larger projects might wish to further divide into separate modules, each comprising of its own Core, UI, Infrastructure, and Service submodules. This approach allows for a scalable and maintainable codebase.
This structured approach to the architecture promotes a clean separation of concerns and enhances the scalability and maintainability of the application. Organizing the project into distinct modules, each with a clear responsibility, ensures a cohesive development process, accommodating projects of varying sizes and complexities.
Building it out
Let’s build towards this architecture.
We’ll start from a simple MV setup and build our dependency injection strategy and module separation from scratch.
Starting with MV
The MV architecture is often misunderstood. It is not about having an object named Model tasked with handling app logic; instead, MV suggests a direct connection between the View and Model layers, without intermediate abstractions. Logic within the Model layer may be structured by using various patterns like Stores, Repositories, UseCases, or Services.
I find it to be a good starting point when considering how to structure your app.
Imagine a screen that shows a list of products you can order.
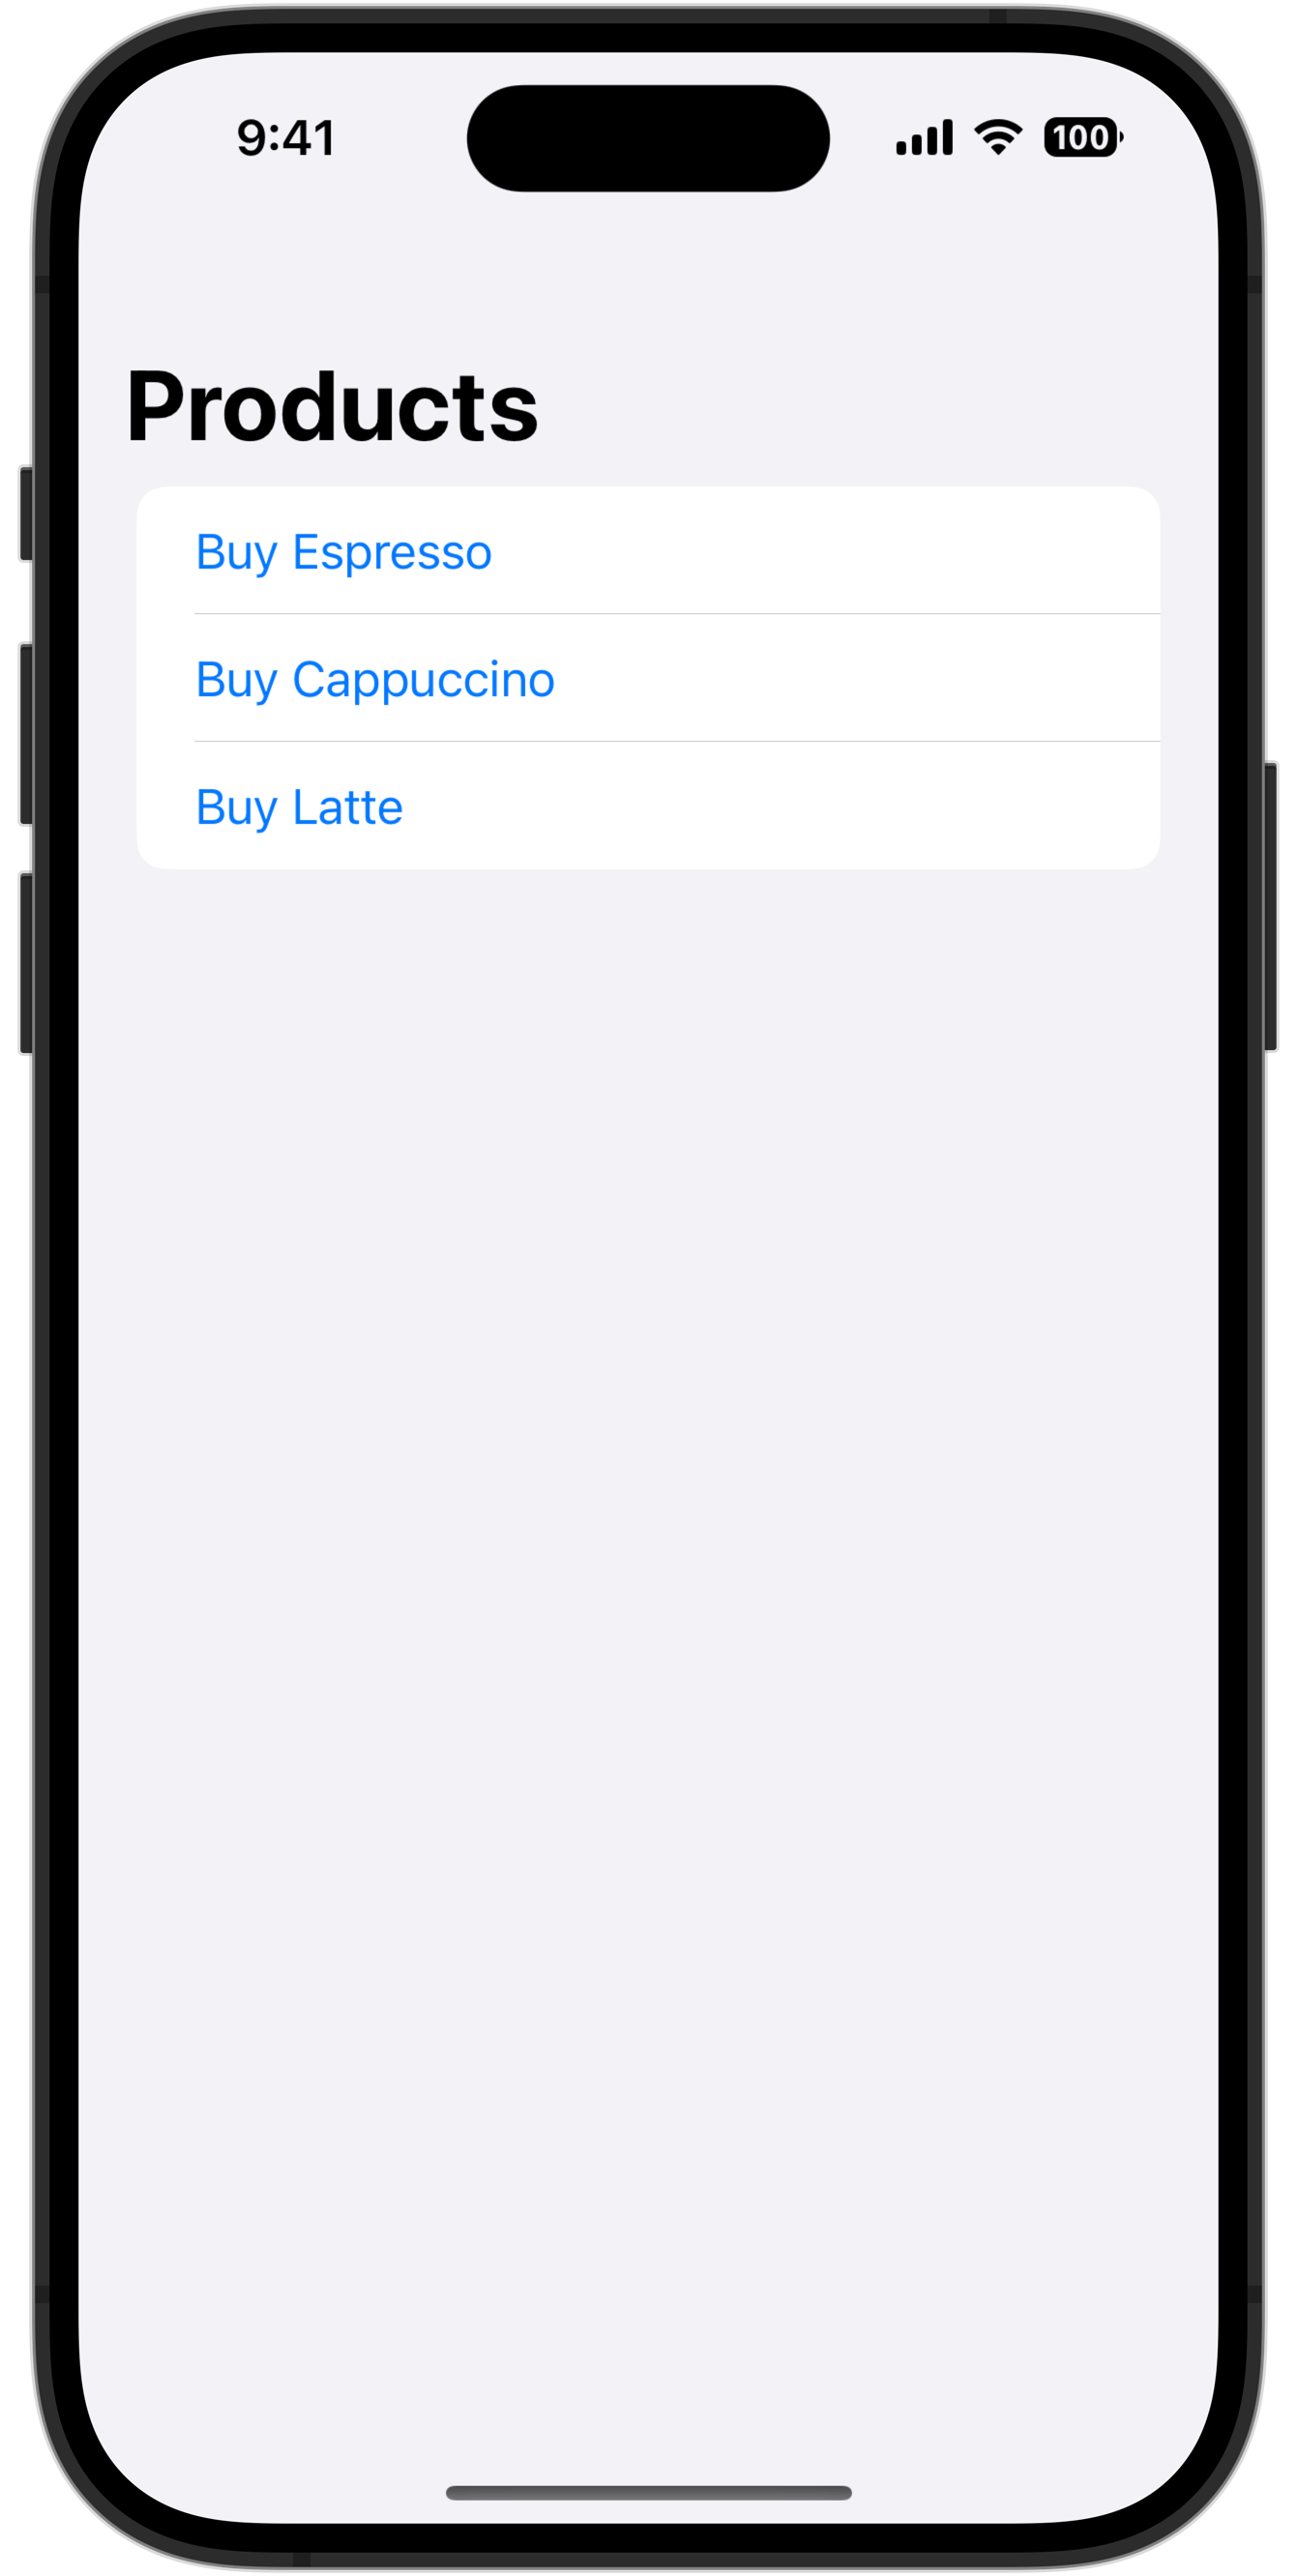
struct ProductsScreen: View {
  @EnvironmentObject private var api: APIClient

  @State private var products: [Product] = []

  var body: some View {
    List(products) { product in
      Button("Buy \(product.name)") {
        Task {
          await api.execute(BuyProductRequest(product))
        }
      }
    }
    .task {
      products = await api.execute(GetProductsRequest())
    }
  }
}

#Preview {
  NavigationStack {
    ProductsScreen()
      .navigationTitle("Products")
      .environmentObject(...)
  }
}
This strikes me as extremely readable, straightforward, and aligning well with the principles outlined for a SwiftUI-first architecture. I believe that anyone familiar with SwiftUI can look at this screen and understand what it does.
Yet, there are obvious challenges when we consider practicalities like writing previews. Even though this screen only has a singular dependency on APIClient, the specifics of when and how this dependency is set are vague. Mocking it likely means creating a network abstraction layer for stubbing API responses, which feels like heavy work just to be able to preview the screen.
Realistically, a preview for the screen would use real networking and feel slow and heavy to use, or it would just not be written.
It seems clear that a more structured approach for providing dependencies is needed.
Injecting actions
One solution is to abstract the use of APIClient through providing a struct of closures from the outside.
struct OrderActions {
  var buy: (Product) async -> Void = { _ in }

  var getProducts: () async -> [Product] = { [] }
}
By refactoring the screen to use these injected actions, creation of previews becomes simpler.
struct ProductsScreen: View {
  let order: OrderActions

  @State private var products: [Product] = []

  var body: some View {
    List(products) { product in
      Button("Buy \(product.name)") {
        Task {
          await order.buy(product)
        }
      }
    }
    .task {
      products = await order.getProducts()
    }
  }
}

#Preview {
  NavigationStack {
    ProductsScreen(order: .init())
      .navigationTitle("Products")
  }
}
Note that we chose semantic naming for our actions. We could have chosen, for example, to abstract api.execute(BuyProductRequest(product)) behind a generic naming like actions.productTapped(product). Instead, we use order.buy(product). Choosing naming close to action's purpose further clarifies the intent behind our code and preserves the context of its use.
Right now, we are passing in actions in the initializer. This allows dependencies to be tailored to the needs of a specific view, but that flexibility can become a nuisance when considered on a bigger scale. The repetitive nature of specifying similar closures for all views can be cumbersome across the entire app.
Given that these actions aren’t really view-specific and aren’t likely to change during the lifetime of the app, it makes sense to inject them somewhere once. Environment is the natural place to put them.
Actions available to the entire module are grouped into a single environment variable, with nested structs providing namespaces for different action categories, such as AppActions.Order.
struct AppActions {
  enum Key: EnvironmentKey {
    static let defaultValue = AppActions()
  }

  var order = Order()
}

extension EnvironmentValues {
  var appActions: AppActions {
    get { self[AppActions.Key.self] }
    set { self[AppActions.Key.self] = newValue }
  }
}

extension AppActions {
  struct Order { ... } // OrderActions moved here
}
Adjusting ProductsScreen involves a single change: using the @Environment wrapper to access order actions.
struct ProductsScreen: View {
  @Environment(\.appActions.order) private var order

  // ...
}
Transitioning to environment-based injection simplifies how the view is created: ProductsScreen(). A proper environment setup is now required, though, for it to work correctly.
Streamlining Environment injection
To ensure all dependencies are correctly injected, we define a custom protocol, ViewInjectable. This protocol assigns the responsibility of setting up the environment to the dependencies themselves.
ViewInjectableis based onViewModifier. We avoid usingViewModifierdirectly because classes can't be view modifiers — a limitation that does not make sense for how we want to build our dependency containers.
protocol ViewInjectable {
  typealias Content = ViewDependencyModifier<Self>.Content

  associatedtype InjectedBody: View

  func inject(content: Content) -> InjectedBody
}

struct ViewDependencyModifier<Dependency: ViewInjectable>: ViewModifier {
  let dependency: Dependency

  func body(content: Content) -> some View {
    dependency.inject(content: content)
  }
}

extension View {
  func dependency(_ dependency: some ViewInjectable) -> some View {
    modifier(ViewDependencyModifier(dependency: dependency))
  }
}
AppActions can conform to this protocol and prepare the environment on its own.
struct AppActions: ViewInjectable {
  // ...

  func inject(content: Content) -> some View {
    content
      .environment(\.appActions, self)
  }
}
Using this in practice:
let actions = AppActions()

ProductsScreen()
  .dependency(actions)
Injecting state
We have explored how actions can drive updates to a view's local state. However, applications often need global or module-wide state that is accessible across multiple views.
Consider an account balance visible and interactive across different parts of the app. While it is feasible to model this using local state within each view, this approach introduces the challenge of maintaining and synchronizing a shared state between views.
final class AccountState: ObservableObject {
  @Published var balance = Balance()
}

struct UserScreen {
  @StateObject private var accountState = AccountState()

  @Environment(\.appActions.account) private var account

  var body: some View {
    //...
      .onAppear { account.connect(accountState) }
  }
}
This shared state may be implemented as a Combine subject, observed and bound to the state property.
let sharedBalance = CurrentValueSubject<Balance, Never>(Balance())

appActions.account.connect = { state in
  sharedBalance.assign(to: &state.$balance)
}
Using AppActions for module-wide actions reduced the boilerplate of passing in dependencies through the initializer. Similarly, introducing AppState for managing global state with the Environment simplifies synchronization of state between views.
struct AppState: ViewInjectable {
  let account = Account()

  func inject(content: Content) -> some View {
    content
      .environmentObject(account)
  }
}

extension AppState {
  final class Account: ObservableObject {
    @Published var balance = Balance()
  }
}
We stick with using
ObservableObjectdue to@Observablebeing unavailable before iOS 17. Support for older OS versions is a requirement for many teams, meaning that it could be years still until it can be used. Our approach is applicable across all versions of SwiftUI, and switching over to Observability should be straightforward.
Using @EnvironmentObject allows UserScreen to access the state.
struct UserScreen: View {
  @EnvironmentObject private var accountState: AppState.Account

  // ...
}
Reliance on EnvironmentObject requires caution since the app will crash if the expected object is not found in the environment. By nesting our global state within AppState, we express our expectation that it is made available alongside other nested objects, mitigating the risk that we forget to set it in some part of our app.
Crafting the dependency container
With AppState and AppActions describing our module’s dependencies, the next step is to define the dependency container, which will be responsible for providing concrete implementations of those dependencies.
For better readability, we combine state and actions together into a single AppDependency.
struct AppDependency: ViewInjectable {
  var state = AppState()

  var actions = AppActions()

  func inject(content: Content) -> some View {
    content
      .dependency(state)
      .dependency(actions)
  }
}
Then, we define the AppContainer protocol.
Up to this point, we have used structs to express our dependencies. Broadly speaking, each time you define a protocol to use in a view, you will need to make views generic over that protocol. This can quickly get out of hand and become frustrating to implement.
The dependency container, however, is the first object that we expect to have multiple implementations. It may even be used to provide dependencies to parts of the app other than our module. As such, defining it as a protocol is a logical choice.
protocol AppContainer: AnyObject, ViewInjectable {
  var app: AppDependency { get }
}
Our first implementation is a mock container that is going to be used for previews.
final class MockAppContainer: AppContainer {
  struct Configuration {
    var balance = Balance()
  }

  var app = AppDependency()

  let configuration: Configuration

  init(configuration: Configuration) {
    self.configuration = configuration

    app.state.account.balance = configuration.balance
  }

  func inject(content: Content) -> some View {
    content
      .dependency(app)
  }
}
Note that this container is implemented so that you can pass in a mock balance value that is then used to prepare the shared state. Actions, however, we have chosen not to customize, leaving them with the default empty implementation.
What you build in the mock container depends on your internal mocking needs. You may decide to have a single mock container that is just as capable as the live one, or to have several smaller containers, or even a mostly empty one that is configured specifically for each view.
In any case, writing a preview now consists of instantiating this container and injecting it in the view with the dependency modifier.
#Preview {
  let container = MockAppContainer(configuration: .init())
  return ProductsScreen()
    .dependency(container)
}
This style of writing previews feels clunky and can be improved further by defining a MockDependencyContainer protocol along with a convenience view to instantiate and inject containers at the same time.
protocol MockDependencyContainer: AnyObject, ViewInjectable { }

struct WithMockContainer<Container: MockDependencyContainer, Content: View>: View {
  private class Storage: ObservableObject {
    let container: Container

    init(container: Container) {
      self.container = container
    }
  }

  @StateObject private var storage: Storage

  private var content: (Container) -> Content

  init(
    _ container: @autoclosure @escaping () -> Container,
    @ViewBuilder content: @escaping (_ container: Container) -> Content
  ) {
    self._storage = .init(wrappedValue: .init(container: container()))
    self.content = content
  }

  var body: some View {
    content(storage.container)
      .dependency(storage.container)
  }
}

extension View {
  @MainActor func mockContainer<Container: MockDependencyContainer>(
    _ container: @autoclosure @escaping () -> Container
  ) -> some View {
    WithMockContainer(container()) { _ in
      self
    }
  }
}
Defining factory methods on a MockDependencyContainer protocol extension gives us an easy way to create mock containers. This approach mirrors SwiftUI's own conventions for creating view components such as view styles and shapes.
final class MockAppContainer: AppContainer, MockDependencyContainer { ... }

extension MockDependencyContainer where Self == MockAppContainer {
  static func app(
    configuration: MockAppContainer.Configuration = .init(),
    configure: (Self) -> Void = { _ in }
  ) -> Self {
    let container = Self(configuration: configuration)
    configure(container)
    return container
  }

  static var app: Self {
    .app(configuration: .init())
  }
}
We can now create previews that are both easy to write and highly configurable. Such versatility is crucial for testing different UI states and behaviors without the need for complex setup for each preview.
// Instantiating and injecting the container with the View extension
#Preview {
  ProductsScreen()
    .mockContainer(.app)
}

// Instantiating and injecting the container, then making it available to use in the view
#Preview {
  WithMockContainer(.app) { container in
    ProductsScreen()
  }
}

// Configuring the container

private let mockBalance = Balance()

// Instantiate the container with configuration
#Preview {
  ProductsScreen()
    .mockContainer(.app(configuration: .init(balance: mockBalance)))
}

// Instantiate the container, then configure it
#Preview {
  ProductsScreen()
    .mockContainer(.app { container in
      container.app.state.account.balance = mockBalance
    })
}
Providing live dependencies
Implementing the live dependency container begins with defining a Service to put the logic we have previously moved out of the view.
The purpose of a Service is to manage global state for the app and to provide implementations of actions for the view dependency. Extracting API calls from the ProductsScreen allowed us to to more easily create previews without worrying about the networking layer. Now, placing this logic in an OrderService gives us an object that is decoupled from UI concerns and testable.
final class OrderService {
  let api: APIClient

  init(api: APIClient) {
    self.api = api
  }

  func buy(product: Product) async {
    let request = BuyProductRequest(product: product)
    await api.execute(request)
  }

  func getProducts() async -> [Product] {
    let request = GetProductsRequest()
    return await api.execute(request)
  }
}
With OrderService defined, we are ready to create the live dependency container. It will be responsible for creating and managing all necessary infrastructure objects (such as the APIClient) and services, and injecting the AppDependency into views.
final class LiveAppContainer: AppContainer {
  struct Configuration {
    let apiBaseURL: URL
  }

  var app = AppDependency()

  let configuration: Configuration

  let api: APIClient

  let orderService: OrderService

  init(configuration: Configuration) {
    self.api = .init(baseURL: configuration.apiBaseURL)
    self.orderService = .init(api: api)

    app.actions.order.buy = orderService.buy(product:)
    app.actions.order.getProducts = orderService.getProducts
  }

  func inject(content: Content) -> some View {
    content
      .dependency(app)
  }
}
The final step is to create an instance of the live container at the entry point of the app.
@main
struct MyAwesomeApp: App {
  @State private var container = LiveAppContainer(
    configuration: .init(
      apiBaseURL: // ...
    )
  )

  var body: some Scene {
    WindowGroup {
      ProductsScreen()
        .dependency(container)
    }
  }
}
Abstracting View components
Some view components might need to be implemented outside the UI module to keep a clear separation of dependencies. For instance, the Infrastructure module might offer convenient views or property wrappers for direct database access.
Take a screen built with Realm that displays a list of favorites, for example. This screen supports swipe-to-delete, search, and shows a custom empty state when no favorites exist.
struct FavoritesScreen: View {
  @State private var searchText = ""

  @ObservedResults(FavoriteObject.self) private var objects

  var body: some View {
    if objects.isEmpty {
      ContentUnavailableView(
        "No Favorites",
        systemImage: "star",
        description: Text("Products that you have favorited will show up here.")
      )
    } else {
      List {
        ForEach(objects) { object in
          Text(object.text)
        }
        .onDelete { offsets in
          $objects.remove(atOffsets: offsets)
        }
      }
      .searchable(text: $searchText, collection: $objects, keyPath: \.text)
    }
  }
}

#Preview {
  NavigationStack {
    ProductsScreen()
      .navigationTitle("Products")
      .environment(\.realm, ...)
  }
}
Realm supplies us with @ObservedResults for fetching and deleting objects, and the searchable view modifier, making it feel very native and at home in SwiftUI.
The problem, again, is in the practicalities, with previews now requiring a Realm database populated with mock objects. An even bigger issue, though, is the need to include Realm as a dependency in our UI code.
Adding Realm to your project adds dozens of seconds to the build time, even on the fastest Macs. Moreover, this is multiplied by the number of target platforms and architectures. Apps targeting multiple platforms will see clean build times increase by several minutes after adding Realm.
This isn’t to discourage the use of Realm; it is merely an example of a heavy dependency you can choose to use in your project. In my experience, a complex dependency graph is the #1 reason previews are slow or fail to build. Since writing previews is not optional, we need to take care to keep our UI module light.
A simplistic solution, then, would be to abandon these tools and pre-convert Realm objects to Core entities before passing them to the screen, meaning that we fetch and convert all necessary FavoriteObjects into an array of Favorites. This requires reinventing how database updates are detected and applied, and is likely to introduce performance problems in the process.
Aside from creating more work for ourselves, disregarding the tools already provided by the framework contradicts the principles of a SwiftUI-first architecture.
The real answer here is to abstract components like views, view modifiers, and property wrappers behind protocols, with concrete implementations residing outside the UI module.
Realm is used for this example because it is an external dependency with an obvious impact on build times. Same abstraction techniques apply for Core Data, SwiftData, and other dependencies that provide SwiftUI components.
Views and view modifiers
Abstracting creation of SwiftUI views with protocols is tricky, mainly due to the fact that Swift does not have generic protocols. Consider this attempt:
protocol FavoriteScreenFactory {
  associatedtype FavoritesView: View
  func makeFavorites(@ViewBuilder content: () -> some View) -> FavoritesView
}
It is actually impossible to properly implement this in Swift without using AnyView somewhere.
func makeObjectsList(@ViewBuilder content: () -> some View) -> some View {
  // You can't use content() to build the resulting View, unless you
  // then wrap it in AnyView, otherwise it will not match the requirements
  // of the FavoriteScreenFactory protocol. FavoritesView associated type
  // can only be resolved to a single concrete type and can't itself further
  // be generic over the type of View we provide in the ViewBuilder.
}
Of course, AnyView is not as evil as it is usually depicted, and solves a real problem here. We will adopt it for now and explore other options later.
protocol FavoriteScreenFactory {
  associatedtype FavoritesView: View
  func makeFavorites(@ViewBuilder content: () -> AnyView) -> FavoritesView

  // Or

  func makeFavorites(@ViewBuilder content: () -> some View) -> AnyView

  // Or even

  func makeFavorites(@ViewBuilder content: () -> AnyView) -> AnyView
}
Getting back to our screen, let’s identify all components that depend on Realm.
- Fetching the list of objects
- Checking if this list is empty
- Iterating through objects with
ForEach - Accessing object’s properties for display
- The deletion action in
onDelete - The
searchablemodifier.
onDelete is defined as an extension on DynamicViewContent, not View, and must be directly attached to ForEach. This means we can’t abstract ForEach behind a protocol if we aim to keep as much of the UI code in the screen as possible. Instead, we will abstract the list of objects itself by declaring an associated type that conforms to RandomAccessCollection and has Identifiable elements, and resolving it with a function that takes a ViewBuilder.
protocol FavoritesScreenFactory {
  associatedtype Objects: RandomAccessCollection where Objects.Element: Identifiable

  associatedtype FavoritesView: View
  func makeFavorites(@ViewBuilder content: (Objects) -> AnyView) -> FavoritesView
}
Next, we add a method to map list objects to model entities.
protocol FavoritesScreenFactory {
  // ...

  func entity(object: Objects.Element) -> Favorite
}
The deletion action actually depends not on the list of objects, but on the property wrapper ObservedResults, requiring one more associated type. makeFavorites function is updated to provide it.
protocol FavoritesScreenFactory {
  associatedtype ObjectsWrapper

  // ...

  func makeFavorites(@ViewBuilder content: (Objects, ObjectsWrapper) -> AnyView) -> FavoritesView

  // ...

  func remove(atOffsets offsets: IndexSet, wrapper: ObjectsWrapper)
}
The final piece to abstract is the searchable modifier. Initially, we may consider once again reaching for our technique with the ViewBuilder.
protocol FavoritesScreenFactory {
  // ...

  associatedtype SearchableView: View
  func makeSearchable(searchText: Binding<String>, objects: ObjectsWrapper, @ViewBuilder content: () -> AnyView) -> SearchableView
}
However, this effectively transforms it from being a view modifier to being a view container and adds a nesting level to our UI code, changing its flow. A better fit is to return a ViewModifier instead of a View.
protocol FavoritesScreenFactory {
  // ...

  associatedtype SearchableViewModifier: ViewModifier
  func makeSearchable(searchText: Binding<String>, objects: ObjectsWrapper) -> SearchableViewModifier
}
If we peek at Realm’s source code, we can see that searchable is not a true view modifier, but just a view extension. We need to create a custom view modifier that wraps it for the implementation.
struct RealmSearchableModifier<Element: Object & Identifiable>: ViewModifier {
  @Binding var text: String

  let collection: ObservedResults<Element>

  let keyPath: KeyPath<Element, String>

  func body(content: Content) -> some View {
    content
      .searchable(text: $text, collection: collection, keyPath: keyPath)
  }
}
Let’s bring it all together.
protocol FavoritesScreenFactory {
  associatedtype Objects: RandomAccessCollection where Objects.Element: Identifiable

  associatedtype ObjectsWrapper

  associatedtype FavoritesView: View
  func makeFavorites(@ViewBuilder content: (Objects, ObjectsWrapper) -> AnyView) -> FavoritesView

  associatedtype SearchableModifier: ViewModifier
  func makeSearchableModifier(searchText: Binding<String>, wrapper: ObjectsWrapper) -> SearchableModifier

  func entity(object: Objects.Element) -> Favorite

  func remove(atOffsets offsets: IndexSet, wrapper: ObjectsWrapper)
}

struct FavoritesScreen<Factory: FavoritesScreenFactory>: View {
  let factory: Factory

  @State private var searchText = ""

  var body: some View {
    factory.makeFavorites { objects, wrapper in
      AnyView(content(objects: objects, wrapper: wrapper))
    }
  }

  @ViewBuilder func content(objects: Factory.Objects, wrapper: Factory.ObjectsWrapper) -> some View {
    if objects.isEmpty {
      ContentUnavailableView(
        "No Favorites",
        systemImage: "star",
        description: Text("Products that you have favorited will show up here.")
      )
    } else {
      List {
        ForEach(objects) { object in
          let favorite = factory.entity(object: object)
          Text(favorite.text)
        }
        .onDelete { offsets in
          factory.remove(atOffsets: offsets, wrapper: wrapper)
        }
      }
      .modifier(factory.makeSearchableModifier(searchText: $searchText, wrapper: wrapper))
    }
  }
}
We can go a step further and eliminate the need for AnyView. While not a problem now, in more complex screens with more components abstracted through a protocol, it can quickly become messy to maintain.
The reason we used AnyView was to work around a language limitation we encountered when passing in a generic ViewBuilder as an argument to a protocol function. Another approach is to instead pass in a concrete type. For this, we introduce an additional type, FavoritesScreenComponents, that holds the code previously passed in a ViewBuilder.
struct FavoritesScreenComponents<Factory: FavoritesScreenFactory>: View {
  let screen: FavoritesScreen<Factory>

  @ViewBuilder func content(objects: Factory.Objects, wrapper: Factory.ObjectsWrapper) -> some View {
    // ...
  }
}

protocol FavoritesScreenFactory {
  typealias Components = FavoritesScreenComponents<Self>

  associatedtype FavoritesView: View
  func makeFavorites(components: Components) -> FavoritesView
}

struct FavoritesScreen<Factory: FavoritesScreenFactory>: View {
  let factory: Factory

  @State var searchText = ""

  var body: some View {
    factory.makeFavorites(components: .init(screen: self))
  }
}
As our dependency grows, we can add more properties and functions to this single type. This approach saves us the effort of defining a new type each time we need to abstract a view component.
Alternatively, for this specific screen, we can sidestep the whole issue by eliminating the need to abstract creation of views altogether, since what we actually need is just the data from the ObservedResults property wrapper.
Let’s look at how we can abstract a property wrapper.
Property wrappers
Before anything else, let’s take a quick detour to talk about what is special about property wrappers that hold state in SwiftUI.
How do SwiftUI property wrappers work?
Property wrappers that maintain state in SwiftUI conform to the DynamicProperty protocol. Views, view modifiers, and some other SwiftUI components are magically connected to all stored properties conforming to this protocol and are notified when the property state changes for a chance to re-evaluate the body.
State changes can only be detected for built-in properties like @State, @Environment, and others. However, SwiftUI leaves a way to implement custom dynamic properties by supporting DynamicProperty composition. If a custom type itself has one or more of the built-in dynamic properties, updates to those properties will cause views to re-evaluate. This even works with an arbitrary level of nested dynamic properties.
Let's put this in practice by building a property wrapper that behaves like a LIFO stack.
@propertyWrapper struct Stack: DynamicProperty {
  private let initialValues: [Int]

  @State private var stack: [Int] // Views are updated when this property changes

  init(_ values: Int...) {
    self.initialValues = values
    self.stack = values
  }

  var wrappedValue: Int? {
    stack.last
  }

  var projectedValue: Self {
    self
  }

  func pop() {
    _ = stack.popLast()
  }

  func reset() {
    stack = initialValues
  }
}
In this setup, wrappedValue returns the last element of the stack, and projectedValue allows access to the Stack itself. The pop and reset functions, respectively, remove the stack's last item and revert it to its initial state.
This wrapper conforms to DynamicProperty, but that alone is not enough to trigger view updates. What actually does it is the fact that state is held in a stored property using SwiftUI State.
Here's an example of a view using this property wrapper:
struct OneTwoThreeStackView: View {
  @Stack(1, 2, 3) private var value

  var body: some View {
    List {
      Section {
        LabeledContent("Current value") {
          if let value {
            Text(value, format: .number)
          } else {
            Text("None")
          }
        }
      }

      Section {
        Button("Pop!") {
          $value.pop()
        }

        Button("Reset", role: .destructive) {
          $value.reset()
        }
      }
    }
  }
}
Creating new dynamic properties by composing existing ones is a powerful technique that allows us to extend or encapsulate their functionality.
Property wrapper composition for abstraction
We can apply this knowledge to extract the use of property wrappers from a screen and abstract it behind a protocol. We’ll start by defining a wrapper that holds ObservedResults and provides functions to map objects to model entities and remove objects from the collection.
struct RealmFavoritesScreenData: DynamicProperty {
  @ObservedResults(FavoriteObject.self) var objects

  var wrapper: ObservedResults<FavoriteObject> {
    _objects
  }

  func favorite(_ object: FavoriteObject) -> Favorite {
    .init(object: object)
  }

  func remove(atOffsets: IndexSet) {
    $objects.remove(atOffsets: offsets)
  }
}
Next, we describe all the necessary parts in a protocol:
protocol FavoritesScreenData: DynamicProperty {
  typealias Object = Objects.Element

  associatedtype Objects: RandomAccessCollection where Object: Identifiable

  associatedtype ObjectsWrapper

  var objects: Objects { get }

  var wrapper: ObjectsWrapper { get }

  func favorite(_ object: Object) -> Favorite

  func remove(atOffsets: IndexSet)
}

// Make our Realm implementation conform
struct RealmFavoritesScreenData: FavoritesScreenData { ... }
The FactoryScreenProtocol can now be modified to provide this property instead of creating a view.
protocol FavoritesScreenFactory {
  associatedtype FavoritesScreenDataType: FavoritesScreenData
  func makeFavoritesScreenData() -> FavoritesScreenDataType

  associatedtype SearchableModifier: ViewModifier
  func makeSearchableModifier(searchText: Binding<String>, objects: FavoritesScreenDataType.ObjectsWrapper) -> SearchableModifier
}
There are two issues we need to solve before we can use FavoritesScreenData in a view.
First, to receive updates when the state changes, a view must directly hold this data in a stored property after the factory creates it. FavoritesScreen holds the factory itself, so there must be one more intermediate view to do it. We achieve this with a convenience view, WithProperty.
struct WithProperty<Property: DynamicProperty, Content: View>: View {
  let property: Property

  @ViewBuilder var content: (Property) -> Content

  var body: some View {
    content(property)
  }
}
The second issue is that ObservedResults relies on realm or realmConfiguration to be correctly set in the environment. There needs to be a way to prepare the environment before accessing data from this property wrapper, which is why we make FavoritesScreenFactory conform to ViewInjectable .
protocol FavoritesScreenFactory: ViewInjectable { ... }
With all the pieces in place, the screen looks like this.
struct FavoritesScreen<Factory: FavoritesScreenFactory>: View {
  let factory: Factory

  var body: some View {
    WithProperty(factory.makeFavoritesScreenData()) { screenData in
      if screenData.objects.isEmpty {
        // ...
      } else {
        // ...
      }
    }
    .dependency(factory)
  }
}
The final step is to modify the AppContainer protocol to provide a method for creating the screen factory.
protocol AppContainer: AnyObject, ViewInjectable {
  associatedtype FavoritesScreenFactoryType: FavoritesScreenFactory
  func makeFavoritesScreenFactory() -> FavoritesScreenFactoryType
}
A Flow holds a reference to the container and can use it when creating a Screen.
struct MainFlow<Container: AppContainer>: View {
  let container: Container

  var body: some View {
    NavigationStack {
      FavoritesScreen(factory: container.makeFavoritesScreenFactory())
        .navigationTitle("Favorites")
    }
  }
}
Factory protocol implementation
With the protocol defined, let's create the two implementations we need: a live one to be used in the app and a mock for previews.
Given that we already have RealmFavoritesScreenData and RealmSearchableModifier, all that's left is to use them in the live implementation, RealmFavoritesScreenFactory.
struct RealmFavoritesScreenFactory: FavoritesScreenFactory {
  let realmConfiguration: Realm.Configuration

  func makeFavoritesScreenData() -> RealmFavoritesScreenData {
    RealmFavoritesScreenData()
  }

  func makeSearchableModifier(searchText: Binding<String>, objects: RealmFavoritesScreenData.ObjectsWrapper) -> some ViewModifier {
    RealmSearchableModifier(text: searchText, collection: objects, keyPath: \.text)
  }

  func inject(content: Content) -> some View {
    content
      .environment(\.realmConfiguration, realmConfiguration)
  }
}
For mocking, we start by implementing MockFavoritesScreenData that relies on State to maintain a list of model entities.
struct MockFavoritesScreenData: FavoritesScreenData {
  @State var allObjects: [Favorite]

  @State var filter: String = ""

  var objects: [Favorite] {
    if filter.isEmpty {
      allObjects
    } else {
      allObjects.filter { $0.text.localizedCaseInsensitiveContains(filter) }
    }
  }

  var objectsWrapper: Self {
    self
  }

  func favorite(_ object: Favorite) -> Favorite {
    object
  }

  func remove(atOffsets offsets: IndexSet) {
    let removedObjectsIDs = Set(offsets.map { objects[$0].id })
    allObjects.removeAll { removedObjectsIDs.contains($0.id) }
  }
}
Supporting search involved doing some work to implement filtering of objects, but overall the implementation is straightforward. Now, for the searchable modifier.
struct MockSearchable: ViewModifier {
  let state: MockFavoritesScreenData

  @Binding var text: String

  func body(content: Content) -> some View {
    content
      .searchable(text: $text)
      .onChange(of: text) { state.filter = $0 }
  }
}
And that is everything our screen needs. We are ready to add the mock factory implementation, MockFavoritesScreenFactory.
struct MockFavoritesScreenFactory: FavoritesScreenFactory {
  let favorites: [Favorite]

  func makeFavoritesScreenData() -> MockFavoritesScreenData {
    MockFavoritesScreenData(allObjects: favorites)
  }

  func makeSearchableModifier(searchText: Binding<String>, objects: MockFavoritesScreenData.ObjectsWrapper) -> some ViewModifier {
    MockSearchable(state: objects, text: searchText)
  }

  func inject(content: Content) -> some View {
    content
  }
}
The mock container can be modified to take a list of favorites for previewing.
final class MockAppContainer: AppContainer, MockDependencyContainer {
  struct Configuration {
    var favorites: [Favorite] = []
  }

  // ...

  func makeFavoritesScreenFactory() -> some FavoritesScreenFactory {
    MockFavoritesScreenFactory(favorites: configuration.favorites)
  }
}

private let mockFavorites: [Favorite] = [ ... ]

#Preview {
  WithMockContainer(
    .app(configuration: .init(favorites: mockFavorites))
  ) { container in
    FavoritesScreen(factory: container.makeFavoritesScreenFactory())
  }
}
Conclusion
There isn't a one-size-fits-all solution when it comes to project architectures, especially with SwiftUI still being relatively new and evolving.
Adopting the principles I've outlined for a SwiftUI-first architecture has helped me re-evaluate how I structure my apps. The approach I follow now does not put restrictions on which parts of SwiftUI can be used, simplifies writing previews, and keeps clarity in my UI code.
Once again, check out the demo project — featuring cute dogs! Feel free to contact me on Mastodon or Twitter if you have any questions, comments, or feedback.